


The first step in launching your application for customers is to ensure compliance-ready authentication and authorization. Instead of developing a system to manage customer logins, which can be time-consuming and costly due to the many tools available on the market, consider using a simple cloud solution like Azure AD B2C. Azure Active Directory B2C (Azure AD B2C ![]() ) is Microsoft’s cloud-based identity management service. It is designed to handle user authentication and authorization in web and mobile applications.
) is Microsoft’s cloud-based identity management service. It is designed to handle user authentication and authorization in web and mobile applications.
An authentication and authorization system should be simple, secure and fault-tolerant. Microsoft Azure AD B2C meets all legal and technical requirements. Stop worrying about customer identity access management (CIAM) and user data privacy requirements, such as the General Data Protection Regulation (GDPR).
Do your clients want to log in via social media accounts? No worries! With Azure Cloud, you can seamlessly integrate various identity providers, including Google, Microsoft, Facebook, and others, as listed here ![]() .
.
How to configure a login system using Azure AD B2C?
Setting up a robust and secure login system is essential for any application that handles user data. The below section will guide you through configuring a login system using Azure Active Directory B2C (Azure AD B2C).
Following these steps will teach you how to set up your environment, create an authorization system, and verify the results to ensure your application is ready for user authentication.
Setting up the environment
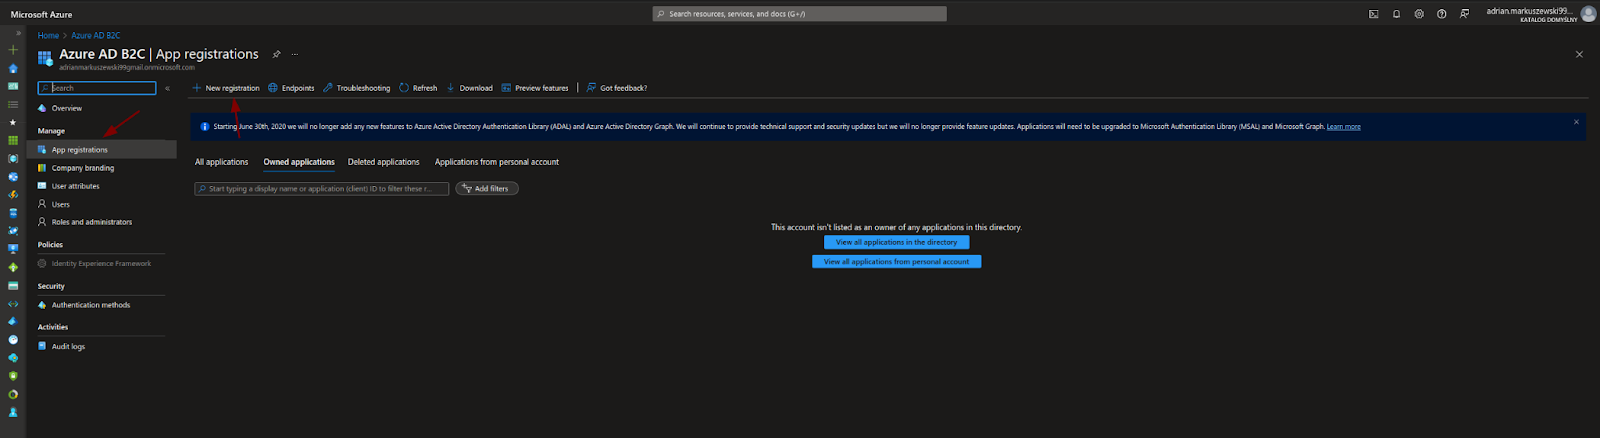
The first step is setting up the environment for our customer identity access management tool. To do this, log in to Azure AD B2C resources and find the section “App registrations”. Then, select the “New registration” option.
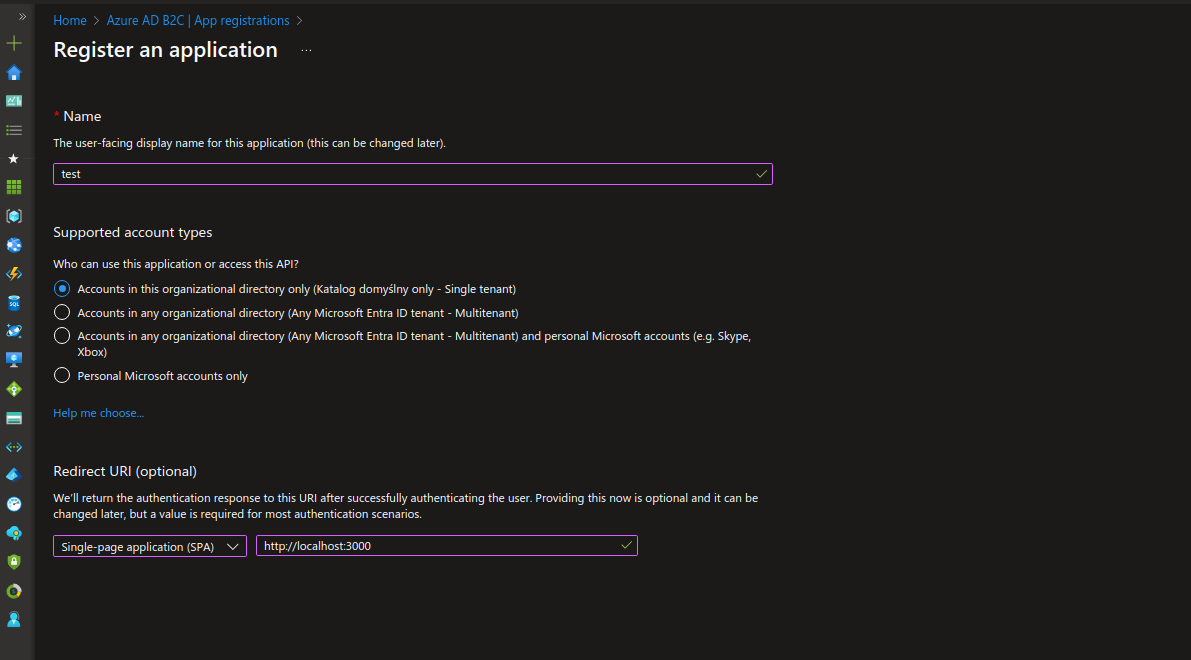
Next, you will be redirected to a simple form where you need to choose the “Name” and “Supported account type” for the application.
The simplest choice is “Single tenant”. In the “Redirect URI (optional)” section, select “SPA” and use the URL http://localhost:3000.
After clicking “Register”, the newly registered application will appear in the list of applications.

Creating an authorization system
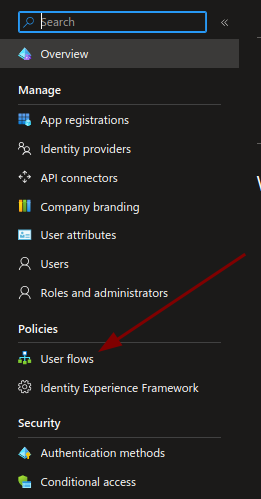
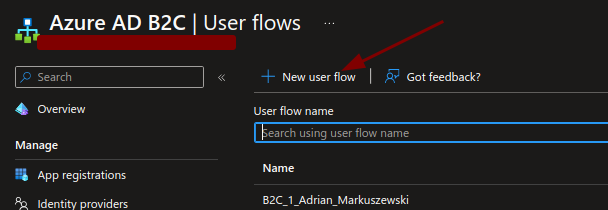
The second step is to create an authorization system for our application. To do this, choose the tab “User flows” and select the “New user flow” button. In the “Select a user flow type” section, choose “Sign up and sign in” to simplify the configuration process.
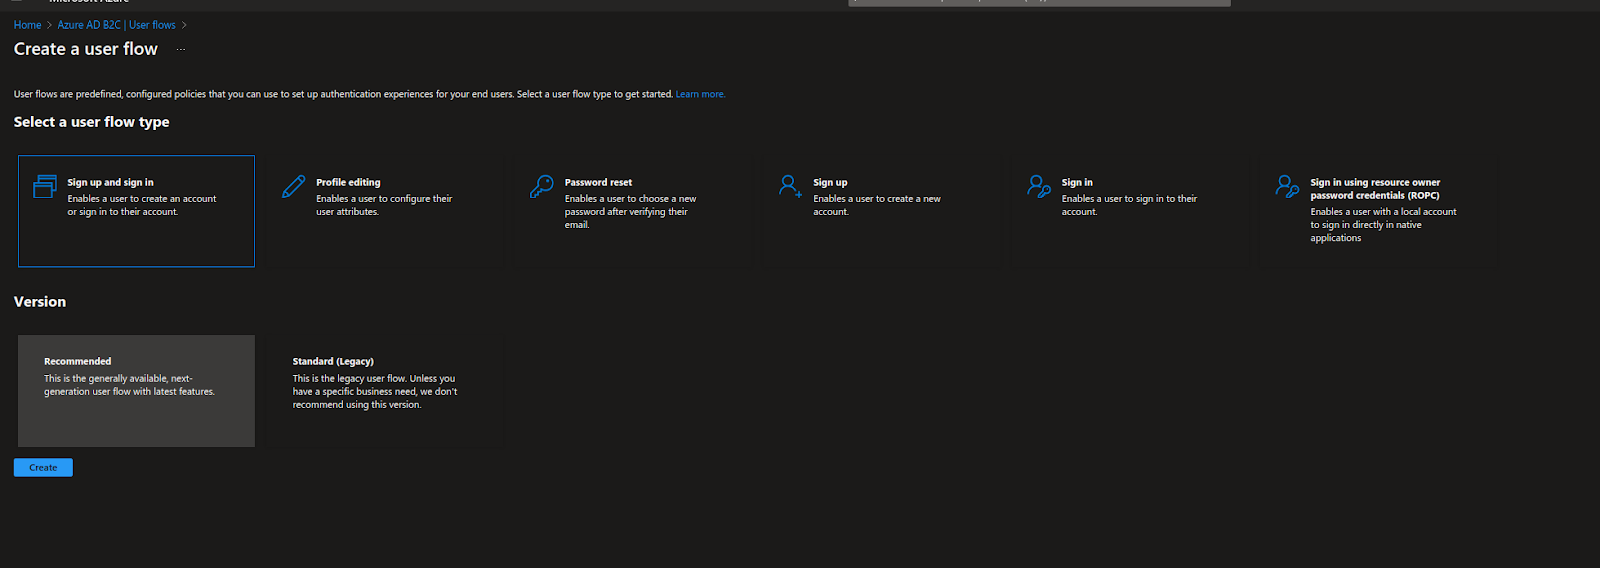
Filling out the configuration flow is really simple. You just need to add the following information:
- Flow “Name”
- Local accounts → “Email signup”
- Multifactor authentication → “Email” / “Off”
- Conditional access → leave unchecked
- Values collected on signup → “Given name” / “Surname” / “Email address”
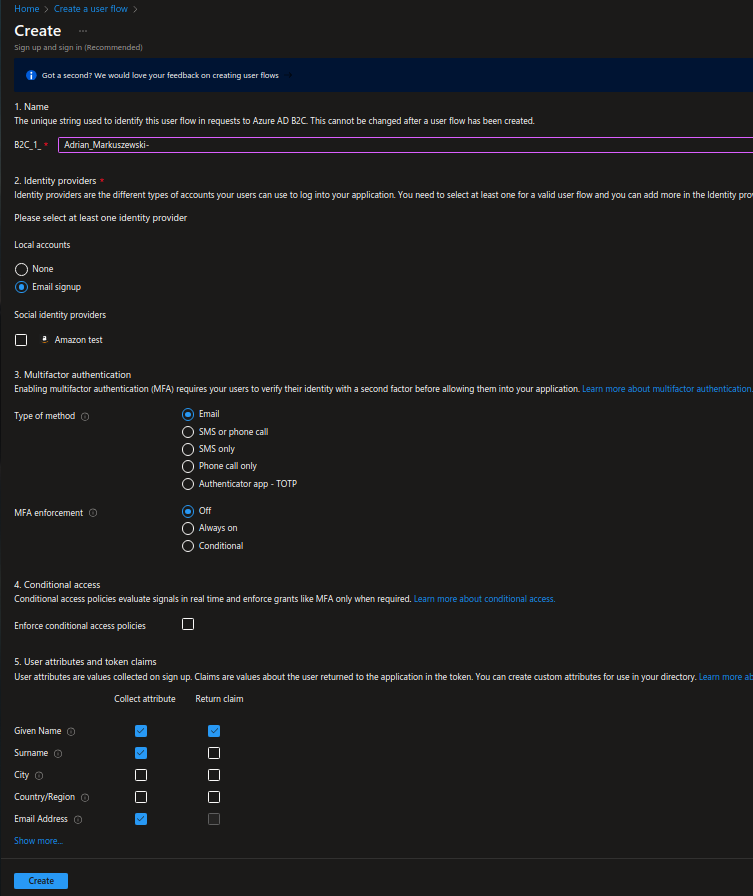
In this case, it will be the simplest configuration, including Multifactor authentication (MFA = password + email_code) and basic user attributes.
Checking the results
The third step is to check the results. After clicking the “Create” button, we can review the sign-in flow. Go to the created flow and click on “Run user flow”.
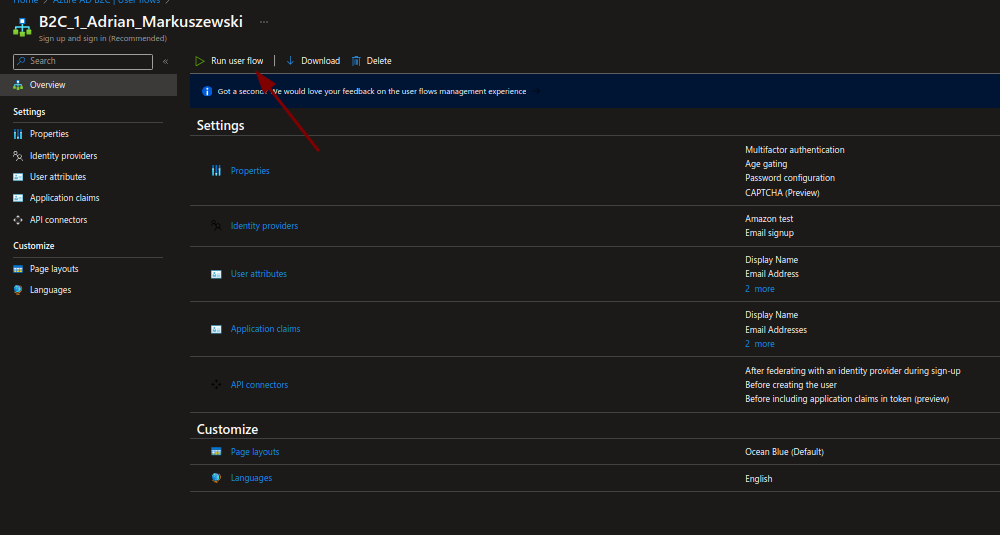
On the right side, you will find the “Run user flow endpoint” section, which includes the URL address where you can access a link to your application and test the created login page.
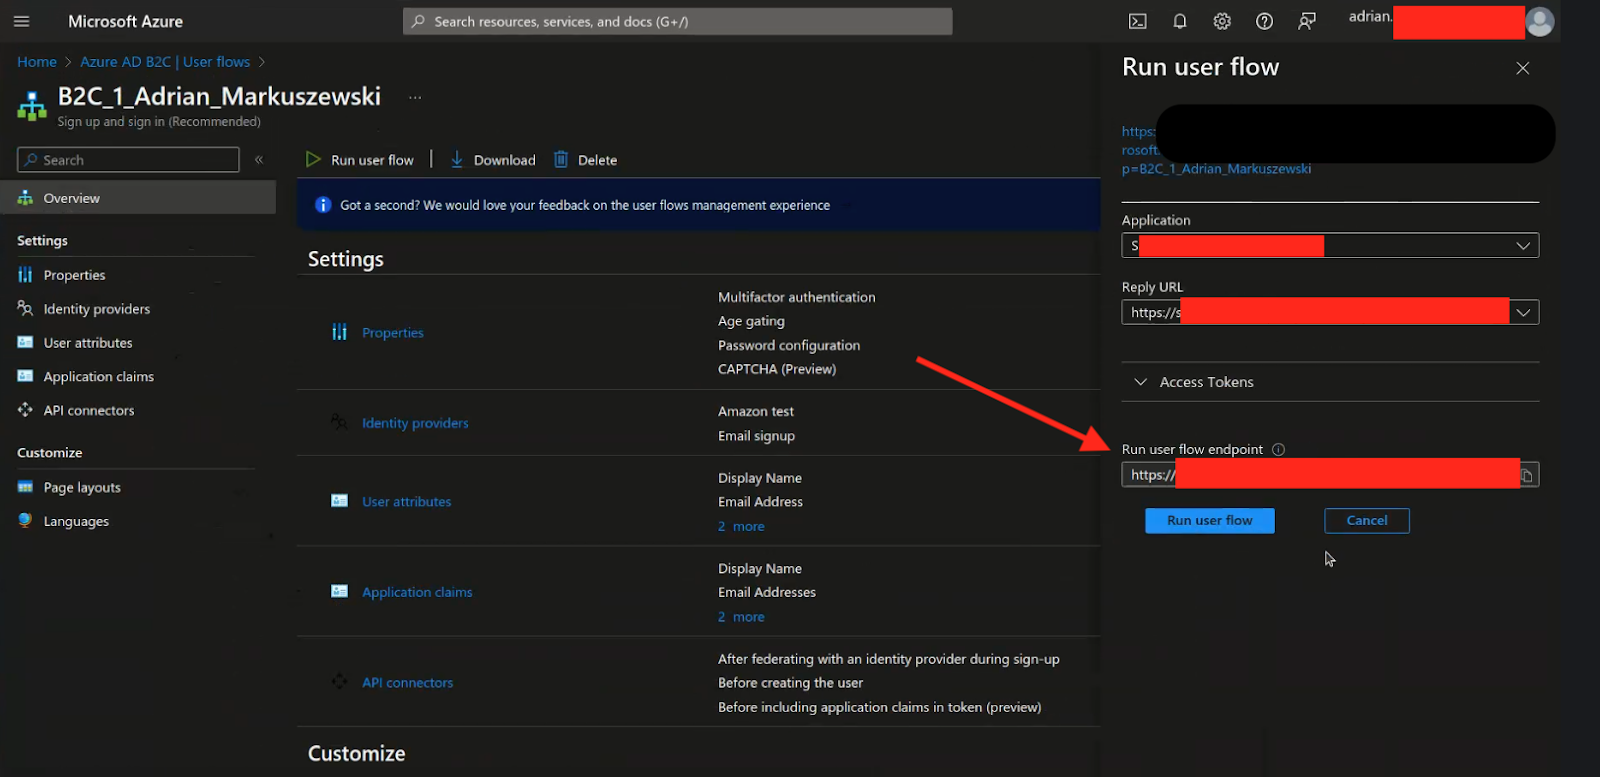
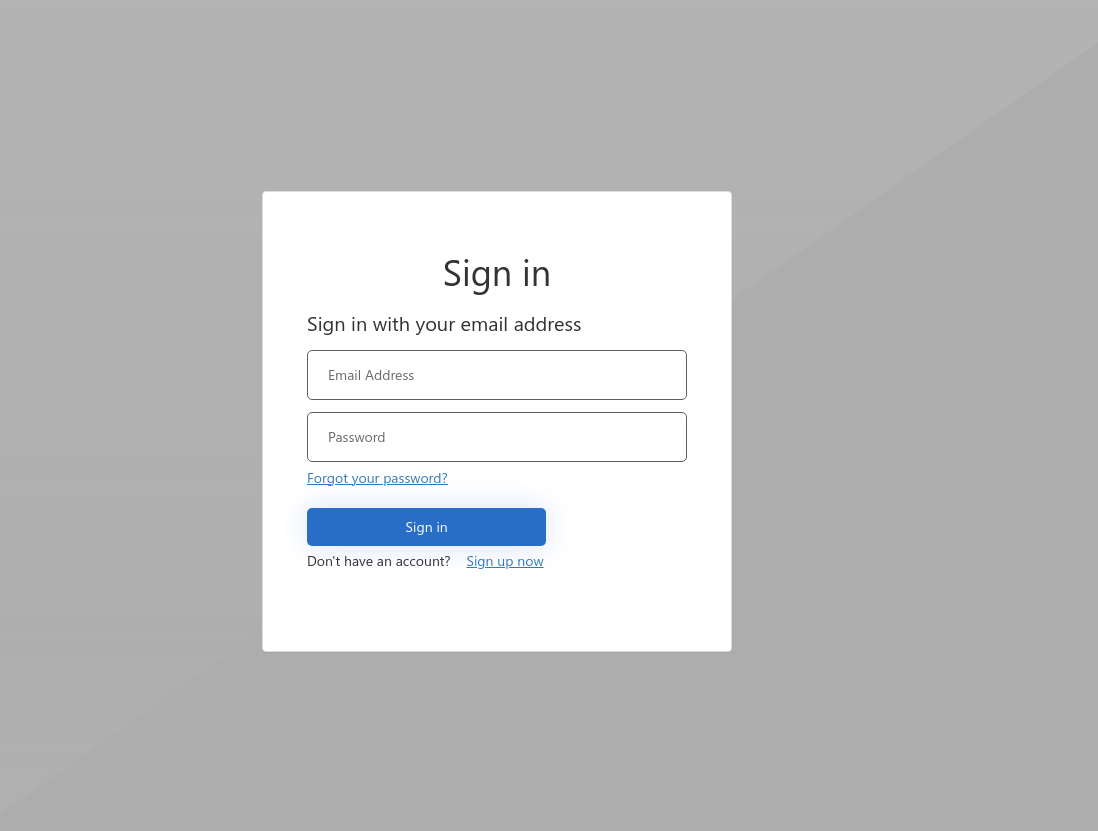
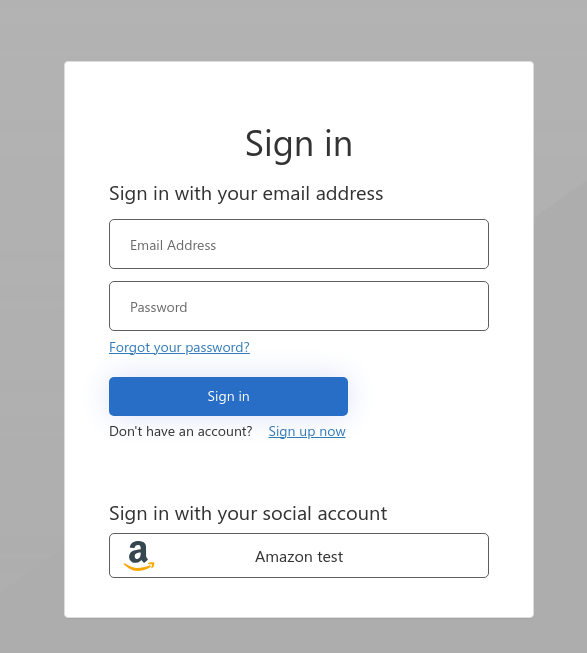
As we can see, the login page is basic, without any styling and authentication via social media. Customizing the UI of the login page will be described in another blog post, because it is not as simple as it seems.
Adding authentication via external identity providers
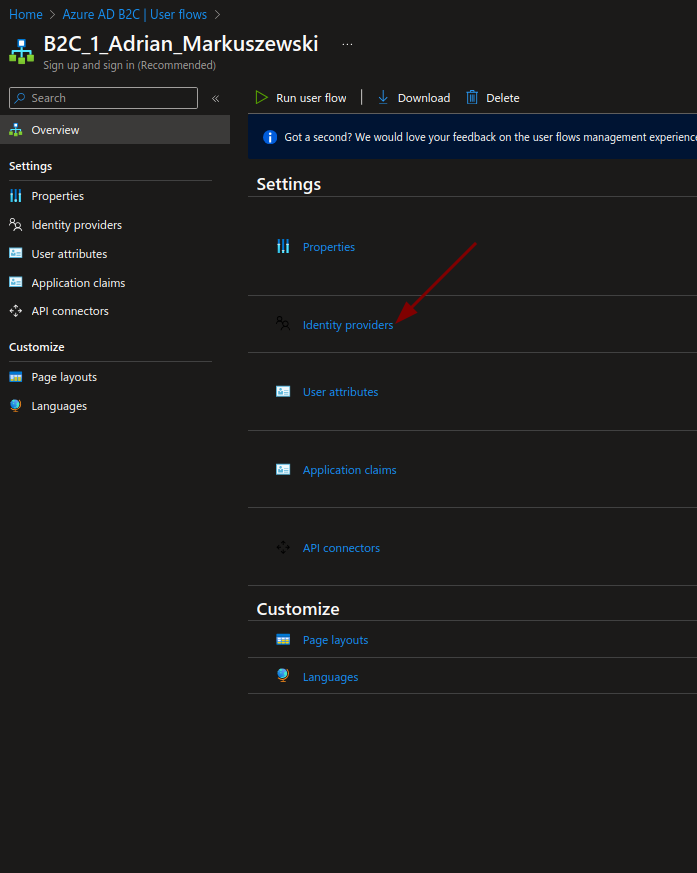
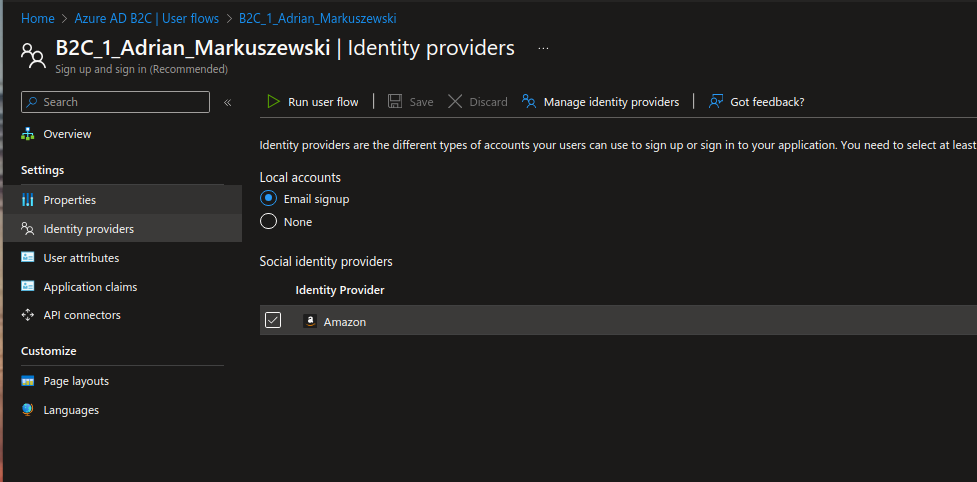
Adding authentication via social media or other identity providers is much easier. Let’s take a look at the settings in our flow. In the “Identity providers” tab, select the “Manage identity providers” option.
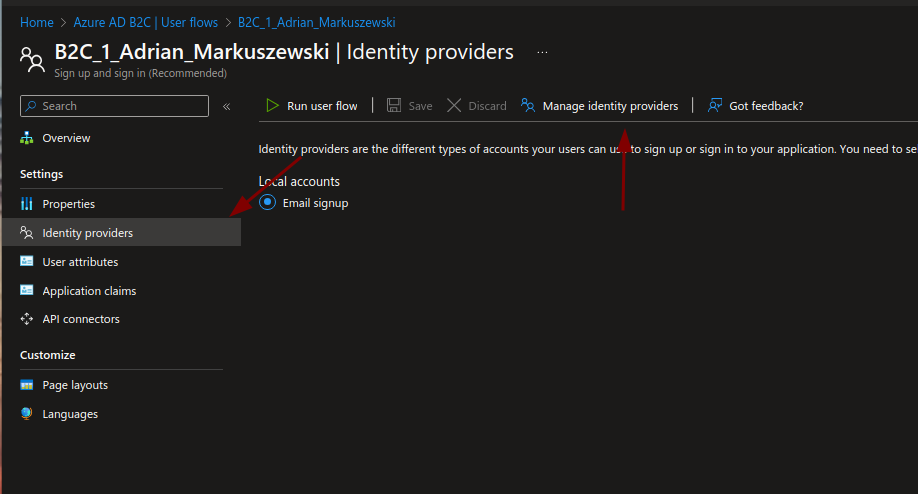
Here, you can configure the identity providers you want to use in your login flow.
In our example, we will configure the Amazon identity provider.
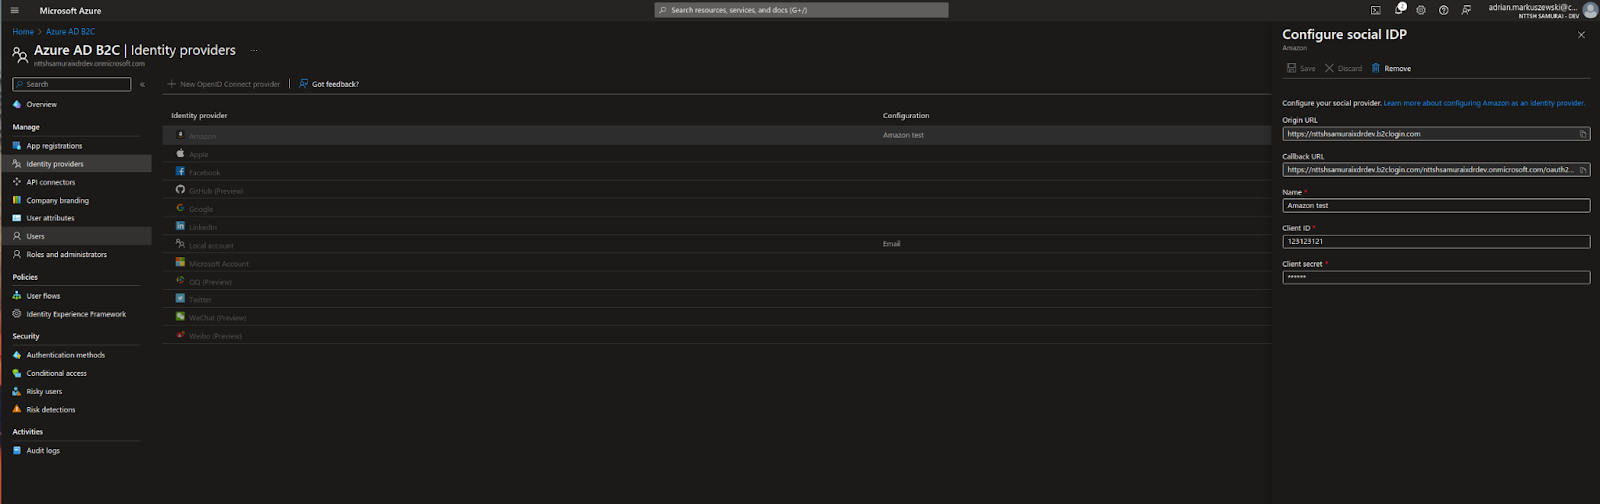
After configuring the Identity providers, you need to go to the created “User flow” and activate the option to sign in via the chosen identity provider (Amazon in our case).
The final effect we can see on the screenshot below.
Summary - what are the benefits of using Azure AD B2C?
Azure AD B2C offers many advantages, including:
- Easy setup
Configuration takes about 10 minutes to enable simple MFA authentication. It is an out-of-the-box cloud-based solution that does not require programming skills.
- Scalability
Multiple applications can be connected to one Azure AD B2C login flow. You do not need to create separate flows for each application you develop.
- Cost effectiveness
Azure AD B2C is free for up to 50,000 users. Beyond 50,000 users, storage accounts are required. The estimated cost to maintain more than 50,000 users is $35.00 per month.
- Compliance
Azure Active Directory B2C meets all legal and user data privacy requirements, including the General Data Protection Regulation (GDPR). B2C has its own hashing algorithm. Administrators do not have access to passwords in clear text.
- Multiplatform support
Azure AD B2C can be a customer identity access management tool for various applications, even those not hosted on Microsoft Azure Cloud. Users can login via Azure AD B2C to applications hosted on platforms like AWS, for example. Azure stores a provider ID.
- Customization
The login page UI can be customized to your preferences, allowing you to add company logos, colors, and other styles. You can also define which user data is collected during registration or login and specify which identity providers (e.g. Facebook, Google) are supported.
- Global storage
in Azure AD B2C, you can select the location ![]() to store clients’ sensitive data, such as the United States, Europe, the Asia-Pacific region, Japan or Australia.
to store clients’ sensitive data, such as the United States, Europe, the Asia-Pacific region, Japan or Australia.
- Remote profile solution
If you want to store user profiles in your own data center (such as a remote database, for example, a CRM system), you can use a remote profile solution ![]() . With Azure AD B2C custom policies, you can integrate with RESTful API services. In such a scenario, after verifying the credentials, Azure calls the REST API, which reads data from the remote database and attaches it to the access token.
. With Azure AD B2C custom policies, you can integrate with RESTful API services. In such a scenario, after verifying the credentials, Azure calls the REST API, which reads data from the remote database and attaches it to the access token.
Requirements:
- Access to the Internet
- Account on Microsoft Azure Cloud (Directory)
- Subscription (technical resources in Azure) on MS Azure Cloud